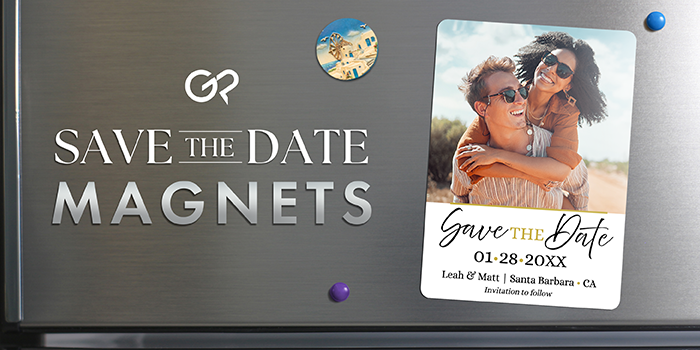
Announce your special day with a save the date that people will be proud to display. Save the date magnets are a fun and functional way to tell people to mark their calendars. Unlike traditional save the date postcards, which require people to use their own magnets to display them, magnetic save the dates easily stick to most people’s fridges. Typically, people send save the dates anywhere from 6 to 12 months in advance. This allows people to prepare their travel arrangements, request time off, and reserve that day for celebrating your relationship.
When designing your wedding save the date magnet, keep in mind that it will be displayed in a space where people spend a lot of time. It’s important to design a stylish save the date that your guests will want to see every time they open the fridge to grab a snack.
Choose a Magnet Size
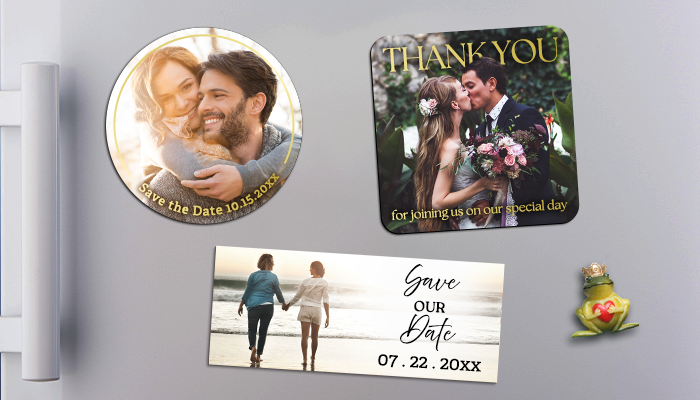
A save the date card is typically 5” x 7”. You can stick with the traditional size for your custom magnet, but you can also explore other magnet shapes and sizes. GotPrint offers fridge magnets in rectangle, square, circle, half circle, leaf, and oval shapes. For a super sleek look, add rounded corners to the rectangle and square magnets. Some people opt for smaller sizes, like the 3” x 3” square magnet. Try not to choose a size that is too large, as that will take up unnecessary space. GotPrint’s magnets are printed on high-quality 17 pt. UV-coated magnetic material, so you know your custom fridge magnets will firmly stick to the magnetic surface.
Choose Artwork
Your customized magnets are going to be displayed in kitchens for months. You want it to be visually appealing and eye-catching. Most save the date images include pictures from an engagement photo shoot. Some people opt for images of their engagement ring or flowers—small details that are meaningful to the couple. A destination wedding save the date should get people excited about their upcoming vacation, so you can use pictures from the location. For a unique save the date, upload a romantic graphic design or illustration. Whatever artistic direction you go, make sure you’re uploading a high-resolution image
The magnet size will also dictate what artwork you use. A smaller magnet has less space, so the photo shouldn’t be too busy. Large magnets let you show off more than one photo, so you can upload a collage. You don’t want your loved ones to feel forced to put up a grainy, pixelated photo in their home.
Finally, the artwork should match your wedding theme. A black-tie wedding shouldn’t have save the dates with a rustic aesthetic. If you’ve already decided on a color scheme, use those shades. Whatever colors you select will appear rich and shiny thanks to the magnets’ glossy surface.
Customize Text
While the photo is the main focus, the text is crucial to conveying important event details. Keep it simple and straightforward; add your names, the date, and the location. Some people also include the URL for their wedding website, which lets you provide more detailed information. Use clear colors and fonts. An overly complicated font might lead to mix-ups about the date. The color also needs to stand out against the image. If you’re wearing a white dress in your engagement photo, then you shouldn’t try to add white (or similarly light) text on top of it. Contrasting colors ensure the words are legible in your design.
Upload your design to GotPrint’s magnet maker to get started. Once you’ve ordered your magnets, make sure you have the rest of your wedding stationery ready to go. Custom envelopes are great for mailing your save the dates, and you can also use them to send your official wedding invitations and thank you cards. Address labels also make it easier to send your wedding invites and other stationery. Your wedding date will stick in your guests’ minds whenever they see your unique magnet.