Online printing became one of the fastest-growing industries for its simplicity and relatively quick ordering process that can be done anywhere, at any time. Professional printing requires some attention to detail in your files. To get your prints looking exactly the way you’d want them to come out, you must make sure that your files are ready for printing before you upload and place your order. If you’re looking for steps on how to prep designs for print, read on to see exactly what steps you need to take to make your files print-ready for the presses.
What are print-ready files?
Though the design portion may be done, your files may still need a bit of tweaking to be considered “print-ready”. Preparing your files for printing is an important step you need to take before uploading your files to place an order. Though products require different templates for setting up files, for example, business card printing vs brochure printing, most of the rules of file setup generally apply across the board.
Read on to see exactly what steps you need to take to make your files print-ready for the presses.
To ensure that your prints will turn out the way you have intended, start by opening your file(s) for a quick run-through and ask yourself the following questions:
1. Are all the images clear and do the files meet the DPI requirements of the product you’re printing?
Having your photos and images come out blurry or pixelated will, quite frankly, ruin your prints. Even if the images look great on your computer screen, prints require a specific DPI/resolution for photos and images to come out crisp. We recommend 300-350 dpi unless a specific product states otherwise.

2. Have you double-checked spelling, numbers, and overall content information for accuracy?
We cannot stress this point enough – especially because our processing team will not be checking these types of errors for you. Make sure everything is spelled correctly and all the information you’ve added is correct. Having a typo on your prints is the last thing you want, especially when it can be easily avoided.
3. Is the text size you’ve selected legible?
You want to make sure your prints are legible for all, so we recommend nothing smaller than 8 pt. For peace of mind, we also recommend doing a test with your at-home printer to see the size of the font in comparison to the print size you’ve selected.
4. Is your artwork properly centered and aligned?
There’s nothing worse than seeing a slightly off-centered element on a print that wasn’t intended, especially if the rest of the print is perfect. Most design programs have guides that will help you with alignment.
5. Are your files flattened and fonts outlined?
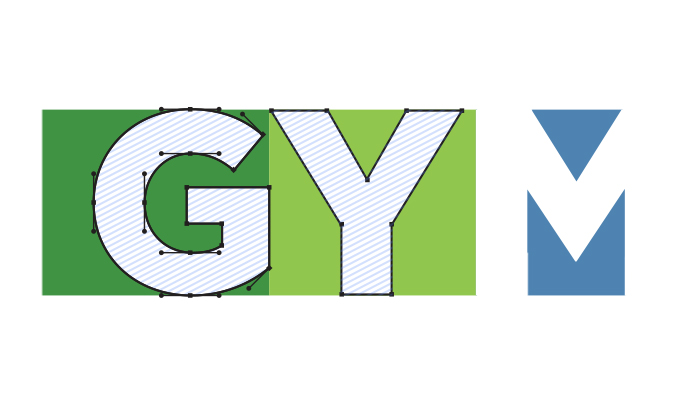
It’s important to flatten your files before saving the file for upload, to ensure that layers don’t get deleted or skewed in the printing process. Additionally, if your fonts are not outlined, a different font may be substituted in your document. If fonts are not embedded and files are not flattened, you risk having your final prints come out much different than intended.
How to Flatten PDF Files (with Steps):
You can flatten your files using Adobe Acrobat Pro or Photoshop. Files created on Adobe InDesign or Illustrator cannot be flattened directly on said platforms and therefore will need to be converted to a PDF first before uploading to Photoshop or Acrobat Pro.
- Photoshop method:
- 1. Open the PDF file*
- 2. Make sure the layer is unlocked
- 3. Right-click on the layer and select “Flatten Image”
- 4. Select “Save As” to save as a Photoshop PDF. Color mode should be CMYK and at 300 dpi.
- *If your files were created directly on Photoshop, skip step 1 and simply use the “Flatten Image” feature directly on your layers.
- Adobe Acrobat Pro method:
- 1. Make sure you have a backup file of your PDF
- 2. Locate Print Production (under the Advanced dropdown or in the Tools tab depending on your version of Acrobat)
- 3. Select the Flattener Preview
- 4. If needed, adjust the Raster/Vector balance. If you choose a balance of 1-99, you will need to deselect the “Clip Complex Regions” box.
- 5. Check the “Convert All Text to Outlines” box
- 6. Click “Apply” to flatten the PDF & close the Flattener Preview
All versions of Acrobat may vary. If these instructions do not help, look up your version number and the steps online for the most accurate results.
How can I check if my PDF is flattened?
If you open your file in programs like Photoshop or Illustrator and there is only one, non-editable layer, then your file is flattened and ready to print. An alternative way to test is by simply opening your PDF and using the highlight method. If you are not able to select or “highlight” any text or elements, then your PDF is ready to go.
Can I edit a file after it’s been flattened?
Once a file has been flattened, you can’t go back and edit the flattened version. We recommend saving a copy of your file before the flattening process to avoid any complications.
6. Does the orientation (horizontal or vertical) of your files match what you’re going to select on the order form?
This point is a given – the orientation of your files needs to match the orientation you intend to print.
7. Will the right side of your “Front” file align with the left side of your “Back” file when printed?
Depending on the product type, most of the time, your front and back files need to both be upright. However, there are certain products that require additional steps, such as Greeting Cards, Brochures, Folded Hang Tags, and Folded Business Cards.
Now that you’re nearly ready to finalize & upload your files, there are still a few things we want to go over with you to ensure your prints turn out exactly how you want them to.
File Types & Color Modes
We accept the following file types for upload: TIF, TIFF, EPS, AI, PSD, BMP, GIF, JPG, PNG, PDF
However, the most convenient and popular file types to upload are PDF, JPG, & PNG
If you are submitting an AI file, please make sure the images within the file are properly embedded or linked and all text is outlined.
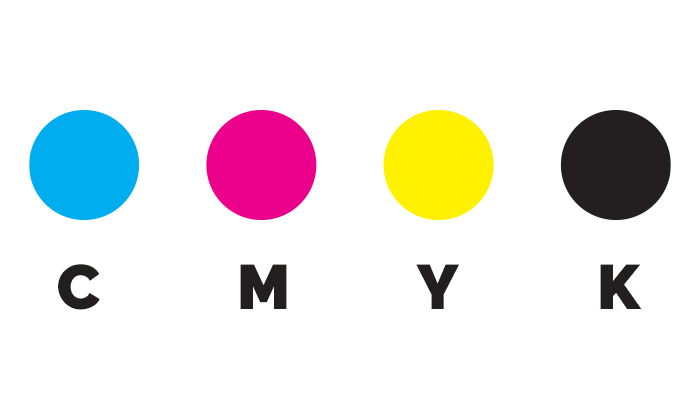
All print files should be in CMYK color mode unless otherwise stated. You can upload in RGB mode but expect that your print colors will look a little different than what you’re picturing on your screen. You can convert your files to CMYK mode before saving your final design for upload. To be certain on what color mode is best, please check the File Setup tab for each product for the required color mode.
Bleed, Trim, and Safety Line
What are those 3 colored lines you see on the view instant proof screen, and what do they mean?
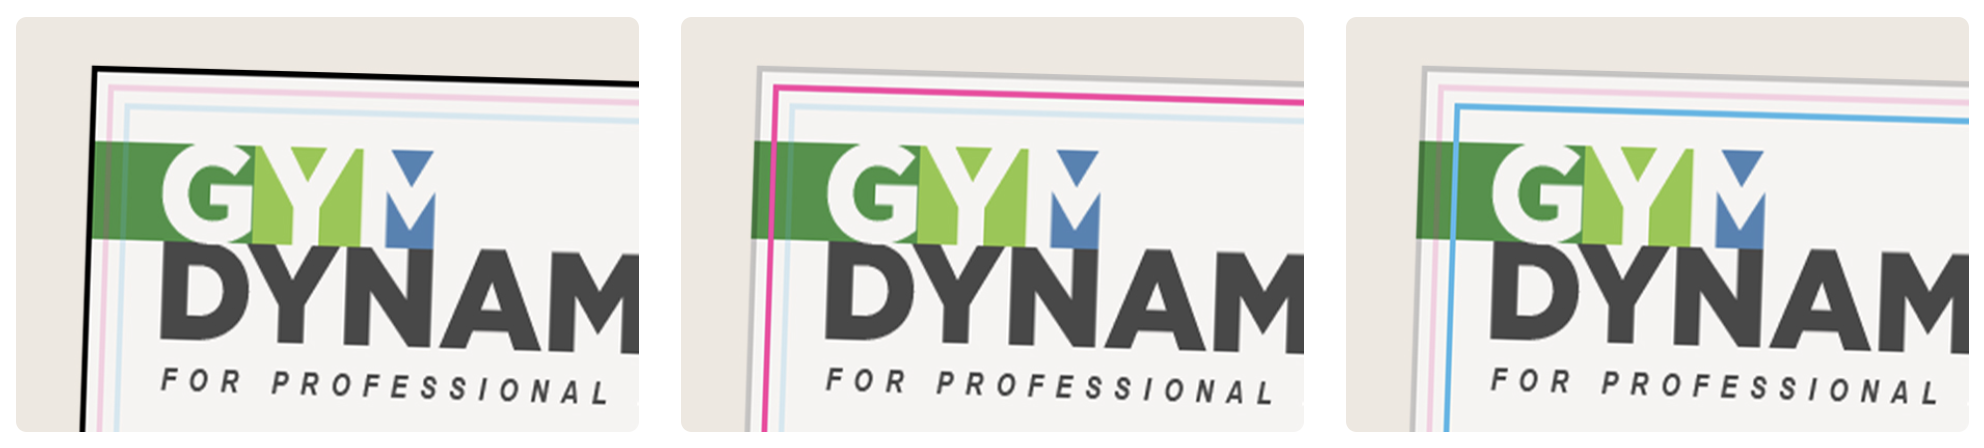
Black: Bleed line – Make sure your background and any elements meant to go on the edge extend all the way to the bleed line.
Pink: Trim line – The product will be trimmed along this area to its final size. Borders are not recommended due to cutting shifts.
Blue: Safety line – Keep text and images within this line. Anything outside this area might get trimmed off.
You can always refer to our Quick Checklist to prepare your files for printing.
Our take on Borders in Designs: Due to possible cutting shifts, we recommend you skip printing designs with borders. However, if your design contains a border, we recommend that it falls within the safe zone guidelines and extends to the edge of the bleed line.
If you want to make sure that your designs fall into the guidelines of the 3 colored lines, we have helpful templates you can download for each product that will act as a guide while you are in the designing stages of your prints.
Still have questions? Visit our Preparing Files FAQ page for additional helpful information.
Browse our selection of products to discover all the custom prints you can order with these helpful steps. If you’re unsure how you want to order your prints – whether you want to design and prep your files yourself or if you want to leave the graphic design and file prepping to the experts for a small additional fee, check out the different methods of ordering prints on GotPrint.com.
If you are looking for tips for designing business cards, this helpful blog on the Easiest Way to Design Your Own Business Cards guides you through a step-by-step tutorial on using our built-in online designer.
We hope this guide has been helpful, but of course, if you still need help, don’t hesitate to reach out to our friendly customer service team.